Introduction
A few weeks ago, I decided to put together a list of cool projects to do in Vue.js and for this reason, I started digging around the internet in search of valuable resources. At the end of the day, I had gathered significant chunks of knowledge on some useful APIs. Among the others, I found the Yandex Translate API really fascinating; it's able to take almost any text and return its equivalent in over 90 languages.
After playing around with the API ( using Postman ) for a bit, I decided to take my Vue.js knowledge and wrap it within the awesomeness of this API. The result? I hacked together a Vue.js translator web application.
During the project, I integrated audio functionally by referencing the ResponsiveVoiceJS CDN and firing a simple function.
Here's a visual display of the completed project :
Let's see how I built it.
Requirements
Since we are going to be building this application with the Progressive Javascript Framework Vue.js, we need to be sure to have a few things installed before proceeding:
We also need:
- An API key to use the Yandex Translate API
To create an account with Yandex, go here:
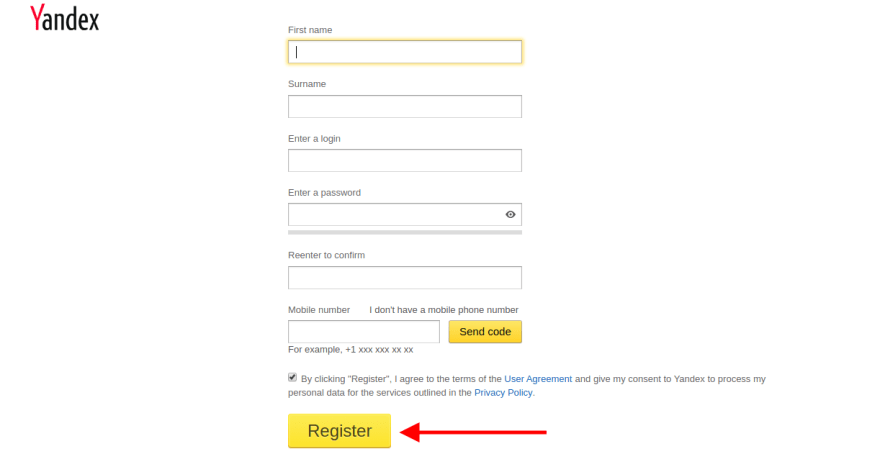
To create a free API key, go here:
![]()
Once the dependencies are installed and you have a key, we are set to begin!
Creating The Project
We'll be creating this project with the Vue-CLI tool, an alternative would be to reference Vue.js from a CDN and you can do that if you choose to.
We'll be using the webpack-simple template since this will not be overly complex to develop.
You might need to change the ownership for the project directory and run some of these commands as root ( using
sudo)
vue init webpack-simple translator
With this command, you'll need to respond to a few lines of command prompt query:

Let's navigate to the project directory and install dependencies :
cd translator
npm install
Creating The Translate Component
We will create exactly one component for this project since we don't want to clutter up the development environment with unnecessary components. This component will contain two textareas positioned side by side; one would hold the text to be translated while the other displays the translated text, both sides will also have an audio functionality.
Let's create a components directory and a translate file in the src directory of our freshly installed project.
mkdir -p src/components
cd src/components
touch translate.vue
This file will contain all the code for the translate component.
Writing The Code For The Translate Component
Before we write any code at all, let's think of the relationship between the root component ( App.vue ) and the child component ( translate.vue ). Let's assume that the heavy lifting would be done by the root component, so the child component would receive props, register a few variables and emit events up to the root component on user interaction.
Now that we understand how this is going to work, let's write some code in the script tag to receive props and initialize variables.
export default {

  name: 'translate',

  props: {

   AvailableLanguages : {
     type : Object
   },

   ResponseText : {
     type : String
   },

   CurrentLanguage : {
     type : String
   },

   TranslateLanguage : {
     type : String
   }
 },

  data () {
    return {
      Text: '',
      FromLanguage : "English",
      ToLanguage : "French"
    }
  }
}
Let's analyze the above code from top to bottom so we understand what is going on:
- First, we are exporting default, which is what would allow us to import this component into the root component.
- We initialize the
namevariable then receive and validate some props, apparently, these props would be coming from the root component. Here's what they are and what they do:
AvailableLanguageswould hold an object of the available languages for translation returned by the Yandex API.ResponseTextwould hold the translated text for a specified language returned by the Yandex API.CurrentLanguagewould be the code for the current language we are typing in.TranslateLanguagewould be the code for the language that the translation would come in.
- Lastly, we initialize a
Text( this is for the text being typed ) variable to an empty string. We then initialize two other variables,FromLanguageandToLanguage, to "English" and "French" respectively. These are the variables that would hold the full name ( not code ) of the selected language.
Awesome.
Writing The MarkUp
Having received the props and initialized some variables in the code above, we should write the HTML now. We will mostly be binding the textareas to their matching data variables and triggering events upon user interaction. The HTML will be written within the template tags so that Vue.js knows that this is MarkUp and renders it at runtime.
<div id="parent_translate">

<div id="input">

<div id="imageholder">

<select v-model="FromLanguage" @change="changeFromLanguage">

<option v-for="(lang, code) in AvailableLanguages" :value="code"> {{ lang }} </option>

</select>

<img @click="translateSpeak" src="../assets/speaker.png">

</div>

<textarea placeholder="Type in something here" v-model="Text"></textarea>

<button @click="submit" id="submit">SUBMIT</button>
</div>

<div id="output">


<div id="imageholder">

<select v-model="ToLanguage" @change="changeToLanguage">

  <option v-for="(lang, code) in AvailableLanguages" :value="code"> {{ lang }} </option>

</select>

<img @click="responseSpeak" src="../assets/speaker.png">

</div>

<textarea placeholder="Your output goes here" disabled v-model="ResponseText"> </textarea>

</div>

</div>
Let's take a close look at the functionality bound to this MarkUp:
The first select tag is bound to the FromLanguage data variable using the v-model directive and it triggers an event handler "changeFromLanguage", whenever its value is changed.
The option tag nested within the first select tag accepts the object of available languages ( which will come as a property from the root component ) and loops through it using the v-for directive. It's :value directive is bound to the code variable so that each option tag created during the loop has it's own unique code.
Let's see some more of the MarkUp :
<select v-model="FromLanguage" @change="changeFromLanguage">

<option v-for="(lang, code) in AvailableLanguages" :value="code"> {{ lang }} </option>

</select>
The img tag just below the previously discussed select tag holds an image representation for audio functionality and directs click events to a "translateSpeak" event handler.
<img @click="translateSpeak" src="../assets/speaker.png">
The first textarea is quite straightforward with what it does, it binds the Text variable with itself so that it displays a placeholder only when there is no text written in it.
<textarea placeholder="Type in something here" v-model="Text"></textarea>

<button @click="submit" id="submit">SUBMIT</button>
The button tag performs a single function; it triggers a submit method whenever it is clicked.
After this point in the MarkUp, the remaining code is just a repetition of what has already been displayed, no new logic or functionality.
Let's write the event handlers within the methods object.
Writing The Event Handlers
Let's begin this section by writing the handlers for the select boxes, they are triggered whenever the selected option is changed.
  changeFromLanguage:function( ev ) {
    let LanguageCode = ev.target.value;
    this.$emit('updateFromLanguage', LanguageCode)
  },

  changeToLanguage:function( ev ) {
    let LanguageCode = ev.target.value;
    this.$emit('updateToLanguage', LanguageCode)
  }
The function of these two handlers is quite obvious. First, a new variable holds the language code for the selected option and then this update is emitted to the root component. The handlers on the root component to handle these emitted events are also specified.
  submit:function( ev ){
    let Word = this.Text
    if ( Word ) {
    this.$emit('translate', Word)
    }
  }
The submit method above is called whenever the Submit button is clicked and its simple job is to emit an event while passing the typed text to the parent component.
Before we look into the event handlers for the audio functions, we have to pull in the ResponsiveVoiceJS library because we depend on it for the audio functions, we can do this by plugging in a script tag just before the closing </body> tag of the index.html file.
<!DOCTYPE html>

<html lang="en">
  <head>
    <meta charset="utf-8">
    <meta name="viewport" content="width=device-width, initial-scale=1.0">
    <link href="https://fonts.googleapis.com/css?family=Indie+Flower" rel="stylesheet">
    <title>A simple translator application using the Yandex API</title>
    <style>

    body{
      overflow-x: hidden;
      overflow-y: hidden;
      background: linear-gradient( to right, DodgerBlue, lightblue);
    }

    </style>
  </head>
  <body>
    <div id="app"></div>
    <script src="/dist/build.js"></script>
    <script src='https://code.responsivevoice.org/responsivevoice.js'></script>
  </body>
</html>
To make the application speak, we require a single function from the ResponsiveVoiceJS library:
responsiveVoice.speak()
We can embed this function within our audio handlers and have something like this:
  translateSpeak:function(){
    responsiveVoice.speak(this.Text);
  },

  responseSpeak:function(){
    responsiveVoice.speak(this.ResponseText);
  }
The speak() function takes in the text in either one of the two data variables and plays it.
Inlcuding Styles
Lastly, let's include some scoped Styles to help things stay pretty:
<style scoped>
#parent_translate {
  width: 100%;
  height: 100%;
  display: flex;
  flex-wrap: nowrap;
  flex-direction: row;
}
select {
  padding: 0.2em 0em;
  margin: 0;
  font-family: 'Indie Flower', cursive;
}
#submit {
background: #4ed34c;
padding: 0.7em;
border: none;
border-radius: 1px;
cursor: pointer;
color: black;
}
#input, #output {
  background-color: #f1f1f1;
  width: inherit;
  height: inherit;
  text-align: center;
  font-size: 30px;
  border-radius: 60px;
}
#input {
  margin: 0px 2px 0px 0px;
}
#output {
    margin: 0px 0px 0px 2px;
}
textarea {
  width: inherit;
  height: 60%;
  margin: 0px;
  padding: 45px 20px;
  box-sizing: border-box;
  outline: none;
  border: none;
  text-align: center;
  font-size: 25px;
  font-family: 'Indie Flower', cursive;
  font-weight: bold;
}
#input > div, #output > div {
  width: inherit;
  height: 20%;
  margin: 0px;
  padding: 0px;
}
#input > div > img, #output > div > img {
 padding: 10px 0px 0px 0px;
 width: 12%;
 height: 60%;
 cursor: pointer;
}
</style>
That's really everything for the translate component, things are about to get functional and way more interesting.
Building The Root Component
Before we start writing code for this component, I want us to quickly explore the Yandex Translate API and retrieve a free key if you haven't already done that because it's essential to the further parts of this project.
After creating an account with Yandex :
You will be able to create a free key :
![]()
Writing The MarkUp
The root component doesn't need so much MarkUp so we will only write a few lines in which we would plug in the translate component as a custom tag :
<div id="app">

<h2>VUE AUDIO TRANSLATOR </h2>

<div id="translate">

<translate v-bind:AvailableLanguages="AvailableLanguages" v-bind:TranslateText="TranslateText" v-bind:ResponseText="ResponseText"  @updateFromLanguage="updateFromLanguage($event)" @updateToLanguage="updateToLanguage($event)" @translate="handleTranslation($event)">
</translate>

</div>

</div>
There are quite two noteworthy activities going on on the <translate> custom tag, let's look at them:
-
AvailableLanguages,TranslateTextandResponseTextare passed down as props. -
@updateFromLanguage,@updateToLanguageand@translateare received as emitted events by the root component from the translate component.
Including Styles
Let's include some styles to help the UI look good:
<style scoped>
#translate {
  height: 45vh;
  max-width: 90%;
  margin: 2.5vh auto;
}
h2 {
  text-align: center;
  font-size: 1.6rem;
  color: black;
  font-weight: bold;
  font-family: 'Indie Flower', cursive;
}
</style>
At this point, we can run the application with this command:
npm run dev
The output shows that the UI of both components have been done but when the dropdown is clicked, it is not populated with languages. This is because we have not written the scripts to drive this functionality.
Let's do that now.
Writing The Javascript
Let's do three things in this component:
- Import the translate component.
- Register the component
- Initialize variables
import translate from './components/translate.vue'

export default {
  name: 'app',

  components: {
    translate : translate
  },

  data () {
    return {
      TranslateText : '',
      ResponseText : '',
      CurrentLanguage : 'en',
      TranslateLanguage : 'fr',
      AvailableLanguages : {}
    }
  }

  }
Hooking Into The Created() Lifecycle Method
Vue.js allows us to hook into different component lifecycle methods and do different things to enhance the flexibility of the application. For this application, we want to send a GET request to the Yandex Translate API when the application is created. Since Yandex Translate API allows us to make an HTTP request for a JSON payload of the supported languages alongside their codes, we will send a request whenever the application is created.
We need an HTTP client to send this request so let's get one, while there are a number of competent alternatives ( vue-resource, Fetch API etc ), we’ll be using the Promise based HTTP client axios.
Let's pull in axios and a small wrapper for integrating axios to Vue.js :
npm install --save axios vue-axios
To actually use axios and vue-axios, we need to import and use them into the src/main.js file :
import Vue from 'vue'
import App from './App.vue'

import axios from 'axios'
import VueAxios from 'vue-axios'

Vue.use(VueAxios, axios)

new Vue({
  el: '#app',
  render: h => h(App)
})
Now that we have set up axios, we can request for the object of supported languages and their codes on every creation of the application:
 created(){

  var self = this;

 this.axios.get('https://translate.yandex.net/api/v1.5/tr.json/getLangs?ui=en&key=YOUR_KEY_GOES_HERE')
  .then(function (response) {
    self.AvailableLanguages = response.data.langs;
  })
  .catch(function (error) {
    console.log(error);
  })

  }
After querying the Yandex Translate API, the response is asynchronously passed back as a Promise, we dig a bit into the response and update the value of the AvailableLanguages object.
Writing The Translate And ValidateResponse Methods
This is the central theme of this entire article because this is where the actual translation of texts and validation of requests happen. We would be doing three simple things here:
- Making a request to the Yandex Translate API with our unique key and the text to be translated.
- Checking the response to confirm whether the text was translated properly or if an error was returned.
- Updating the value of the
ResponseTextdata variable if the response code is200or logging an error string to the console when it's not.
translate:function(){

  var self = this;

 this.axios.get('https://translate.yandex.net/api/v1.5/tr.json/translate?key=YOUR_KEY_GOES_HERE&text='+self.TranslateText+'&lang='+self.CurrentLanguage+'-'+self.TranslateLanguage+'&format=plain')
  .then(function (response) {

  self.validateResponse(response);
  })
  .catch(function (error) {
    console.log(error);
  })

  },

  validateResponse:function(response){

        if (response.status === 422) {

            console.log('Could Not Translate Text Please Try Again Later');

        } else if (response.status === 413) {

            console.log('Please Enter A Shorter Text to translate');

        } else if (response.status === 200) {

           this.ResponseText = response.data.text[0]

        } else {

          console.log('Cannot translate at this moment please try again later');
        }
    }
That is pretty much the entire function of these methods, let's see how the root component handles the emitted events from the translate component.
Writing The Event Handlers
From the earlier section above, we know that the root component has to handle three events emitted by the translate component:
@updateFromLanguage,@updateToLanguageand@translate
Let's write the methods to handle these respectively:
  updateFromLanguage:function( value ){
    this.CurrentLanguage = value;
    this.translate();
This handler receives a value from the translate component and updates the value of the CurrentLanguage variable with it. It then calls the translate() method to complete its job.
This is the method that is triggered on the root component whenever a new language ( the language to be translated from ) is selected.
The reason it calls on the translate method is so that a user can get instant updates on translations as they toggle between languages, without having to hit the submit button every time.
  updateToLanguage:function( value ){
    this.TranslateLanguage = value;
    this.translate();
  }
This method does nearly the same thing as the one above, the only difference is that it works on the selection of the language being translated to, rather than the language being translated from.
Lastly, behold the method for handling click events to the submit button of the translate component:
  handleTranslation:function( value ){
    this.TranslateText = value;
    this.translate();
  }
This handler simply updates the TranslateText variable with the value of the parameter received from the translate component, then it translates the text by calling the translate() method.
Running The Application
We can run the application with this command :
npm run dev
This should open a new window in the browser at the development address localhost:8080 :
That is all! We have just built a functional audio translator application and it's ready for testing.
Build The Application
We can optionally build for production with this command:
npm run build
Conclusion
In this tutorial, we have seen how to build a simple audio translation application in Vue.js. We also used a powerful HTTP client, axios to query the Yandex Translate API for data.
We can conclude that Vue.js is a very exciting Progressive Framework to build lots of awesome projects.
The code for this project is available on Github.


Top comments (0)